 Pin It
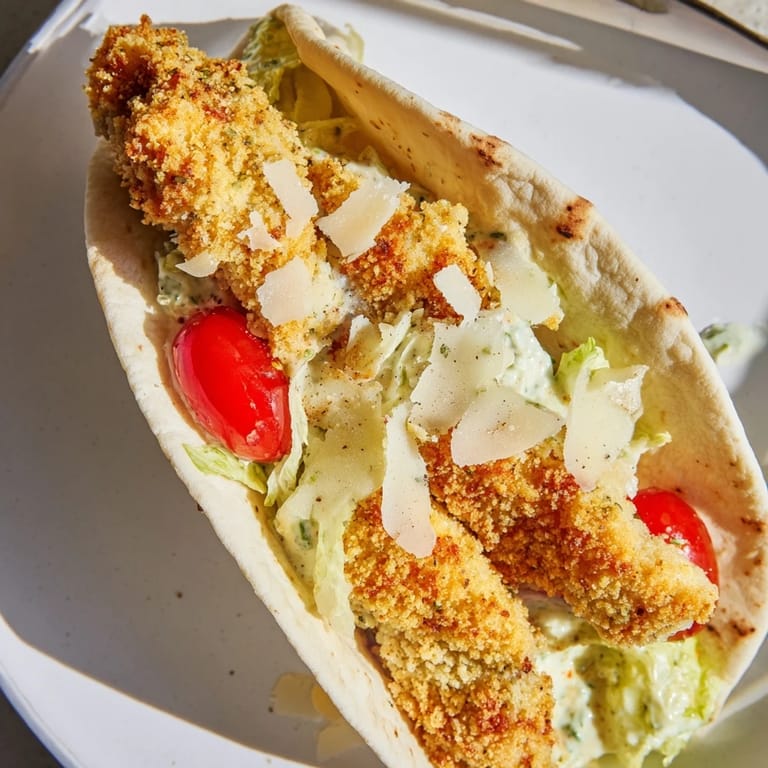
 The first time I stuffed Caesar salad into a pita, my husband looked at me like I'd lost my mind. But one bite in and he was converted. There's something magical about warm bread meeting cool, crisp lettuce and still-crispy chicken. I make these at least twice a month now, especially when I want all the satisfaction of a Caesar without committing to a full sit-down dinner.
Last summer, my daughter had her best friend over for lunch, and I decided to experiment with handheld versions of their restaurant favorites. These pitas disappeared so fast that I barely got to try one myself. Now whenever her friend visits, she asks if 'those chicken Caesar pockets' are on the menu. Kids and adults alike seem to appreciate that mess-free moment when food is packaged so perfectly.
Ingredients
- Chicken breasts: Cutting them into strips yourself means you control the size, ensuring each pita gets evenly portioned pieces
- Buttermilk: The acidity here works double duty, tenderizing the meat while helping the coating cling better
- Panko breadcrumbs: Japanese-style breadcrumbs create an irresistibly light, shatteringly crisp exterior that regular crumbs can't match
- Grated Parmesan: Mixing it directly into the coating infuses every bite with savory depth rather than just surface flavor
- Romaine lettuce: Sturdy enough to hold up against warm chicken without immediately wilting like more delicate greens would
- Caesar dressing: Making your own yields the best results, but a quality store-bought version works perfectly here too
- Pita breads: Warmed until slightly pliable, they create a soft pocket that cradles everything without falling apart
Tired of Takeout? 🥡
Get 10 meals you can make faster than delivery arrives. Seriously.
One email. No spam. Unsubscribe anytime.
Instructions
- Marinate the chicken:
- Let those strips soak in buttermilk for at least 15 minutes while you prep the coating mixture
- Make the coating:
- Whisk together panko, grated Parmesan, garlic powder, paprika, salt, and pepper until evenly combined
- Coat the chicken:
- Shake off excess buttermilk and press each strip into the crumb mixture, ensuring an even layer
- Air fry until golden:
- Arrange in a single layer, spritz with cooking spray, and cook at 400°F for 10-12 minutes, flipping halfway through
- Prepare the salad:
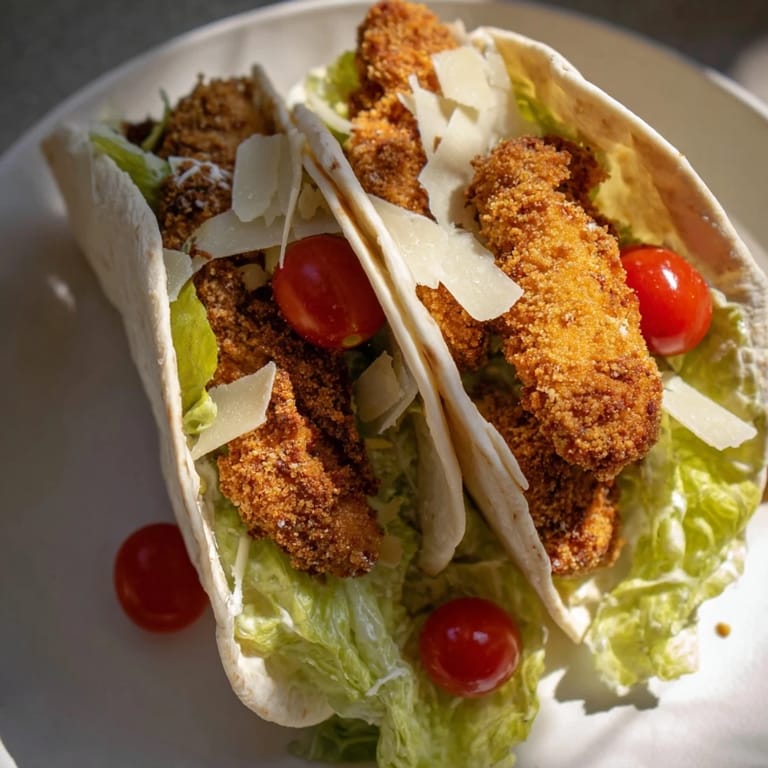
- Toss chopped romaine with Caesar dressing, shaved Parmesan, and cherry tomatoes while chicken cooks
- Warm the pitas:
- Quickly heat them in a dry skillet or microwave until pliable enough to open without tearing
- Assemble and serve:
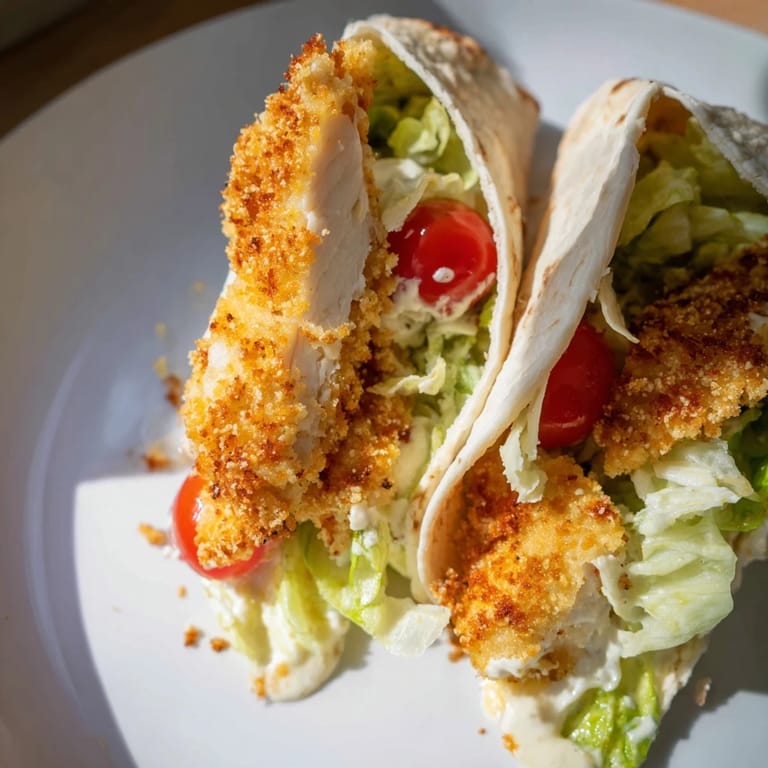
- Stuff each pita with salad, add 2-3 chicken strips, and finish with extra dressing and a squeeze of lemon
 Pin It
 My mom always said that comfort food should hug you back, and these pitas do exactly that. They've become my go-to when friends are going through tough times because they feel substantial and nurturing without being heavy. Food really does have this way of showing up for people when words fall short.
Making It Your Own
Sometimes I add thinly sliced red onions or bell peppers for extra crunch and color. A handful of homemade croutons tucked inside adds another layer of texture that people never expect but always love. You could also swap in grilled chicken if you don't have an air fryer, though that satisfying crunch will be different.
Timing Everything Right
The key is having the chicken finish cooking right as you're ready to assemble, so the strips are still hot when they hit the cool lettuce. I usually start warming the pitas during the last two minutes of air frying. This little bit of meal prep strategy makes the final dish feel restaurant-quality without any stress.
Serving Suggestions
These pitas work beautifully alongside simple roasted vegetables or a light soup if you want to round out the meal. For a casual dinner party, I'll set up a toppings bar and let everyone customize their own.
- Extra lemon wedges make all the difference for cutting through the richness
- Have napkins ready, because handheld doesn't mean mess-free
- Leftover chicken (if there is any) makes an incredible salad topping the next day
 Pin It
 I hope these pitas find their way into your regular rotation and become something your people ask for by name. There's something deeply satisfying about food that's both comforting and convenient.
Recipe Questions
- → Can I bake the chicken instead of air-frying?
Yes, bake the breaded chicken strips at 425°F for 15-18 minutes, flipping halfway until golden and cooked through. The texture remains crispy though slightly less intense than air-frying.
- → What makes pita bread easy to stuff?
Warm the pitas in a dry skillet or microwave for 20-30 seconds. This softens them, making it easier to cut open and form pockets without tearing. Look for pocket-style pitas rather than flatbreads.
- → How do I prevent soggy pitas?
Dress the romaine lightly and assemble just before serving. If packing for later, keep dressing separate and add right before eating. Adding croutons also helps absorb excess moisture.
- → Can I use store-bought chicken tenders?
Absolutely. Bake or air-fry according to package directions until crispy. Homemade buttermilk-marinated chicken offers superior flavor and tenderness, but store-bought works in a pinch.
- → What Caesar dressing works best?
Traditional creamy Caesar dressing provides the most authentic flavor. For a lighter version, try Greek yogurt-based Caesar. The classic dressing typically includes anchovies—great for umami, but check labels if avoiding fish.
- → How do I get the crispiest chicken coating?
Let excess buttermilk drip off before dredging. Press the breadcrumb mixture firmly onto each strip to ensure good adhesion. A light coating of cooking spray before air-frying promotes even golden browning.