 Pin It
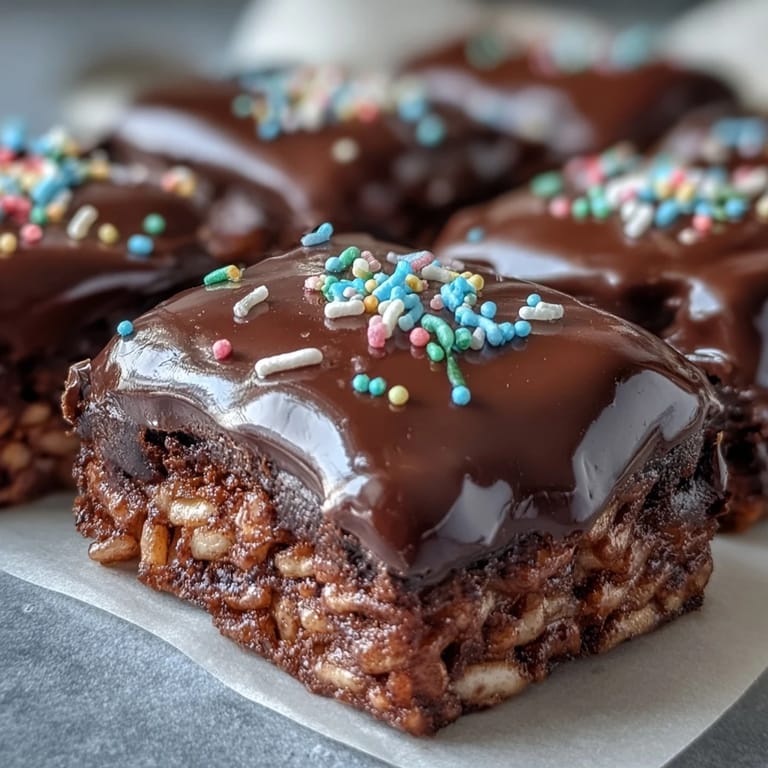
 My nephew once walked into the kitchen while I was melting butter on the stove and asked if we could make something fun together. I spotted the cereal box on the counter, a bag of marshmallows in the pantry, and a handful of chocolate chips left over from last week's cookies. Within an hour, we had a pan of glossy, sprinkle-topped bars cooling on the counter, and he couldn't stop grinning. That afternoon taught me that the best treats don't need fancy techniques—just a little creativity and someone to share them with.
I brought a platter of these to a potluck last spring, and they vanished before the main course even hit the table. Someone's toddler kept sneaking back to grab another square, and her mom joked that she'd never seen her daughter so determined. Later, a friend asked for the recipe, and I realized I'd stumbled onto something that bridges every age group. There's a nostalgia factor for adults and a candy-like appeal for kids, all wrapped into one simple treat.
Ingredients
- Unsalted butter: I always use unsalted so I can control the salt level myself, plus a little extra for greasing the pan keeps the bars from sticking.
- Mini marshmallows: They melt faster and more evenly than the large ones, creating a smooth, gooey binder that coats every piece of cereal.
- Rice Krispies cereal: The light, airy texture is key to that signature crunch, and it holds up beautifully under the weight of melted marshmallow and chocolate.
- Fine sea salt: A pinch balances the sweetness and makes the chocolate topping taste even richer.
- Semisweet or dark chocolate chips: I prefer semisweet for a classic flavor, but dark chocolate adds a sophisticated edge if you want less sugar.
- Vegetable oil or coconut oil: Just a teaspoon thins the chocolate enough to spread smoothly without seizing up.
- Rainbow sprinkles or chopped nuts: Sprinkles add a pop of color and a hint of crunch, while nuts bring a toasted, earthy note that complements the chocolate.
Tired of Takeout? 🥡
Get 10 meals you can make faster than delivery arrives. Seriously.
One email. No spam. Unsubscribe anytime.
Instructions
- Prep Your Pan:
- Lightly grease an 8x8-inch or 9x9-inch square baking pan with butter, rubbing it into every corner so the bars lift out cleanly later. If you have parchment paper, line the pan with an overhang on two sides for even easier removal.
- Melt the Butter:
- In a large saucepan over low heat, melt the butter slowly, stirring constantly to keep it from browning or burning. The gentle heat ensures the marshmallows will melt smoothly in the next step.
- Stir in Marshmallows:
- Add the mini marshmallows to the melted butter and keep stirring until they dissolve into a glossy, sticky mixture. Remove the pan from heat as soon as the last few lumps disappear, then stir in the sea salt if you're using it.
- Fold in Cereal:
- Pour the Rice Krispies into the marshmallow mixture and fold gently with a spatula until every piece is coated. Work quickly but carefully to avoid crushing the cereal.
- Press into Pan:
- Transfer the mixture to your prepared pan and use a buttered spatula or clean, slightly damp hands to press it down evenly and firmly. Let the layer sit at room temperature for about 10 minutes to firm up before adding chocolate.
- Melt the Chocolate:
- In a microwave-safe bowl, combine chocolate chips and oil, then heat on medium power in 30-second intervals, stirring after each burst. Stop as soon as the chocolate is smooth and glossy to prevent scorching.
- Pour and Spread:
- Pour the melted chocolate over the cooled cereal layer, then use an offset spatula or the back of a spoon to spread it into an even, glossy coat. Work quickly before the chocolate begins to set.
- Add Garnish:
- Immediately scatter rainbow sprinkles or chopped nuts over the wet chocolate, pressing them in gently with your fingertips so they stick. The sooner you do this, the better they'll adhere.
- Let Set:
- Allow the treats to sit at room temperature for at least 1 hour, or refrigerate for 20 to 30 minutes if you're in a hurry. The chocolate should be firm to the touch before you cut.
- Cut into Bars:
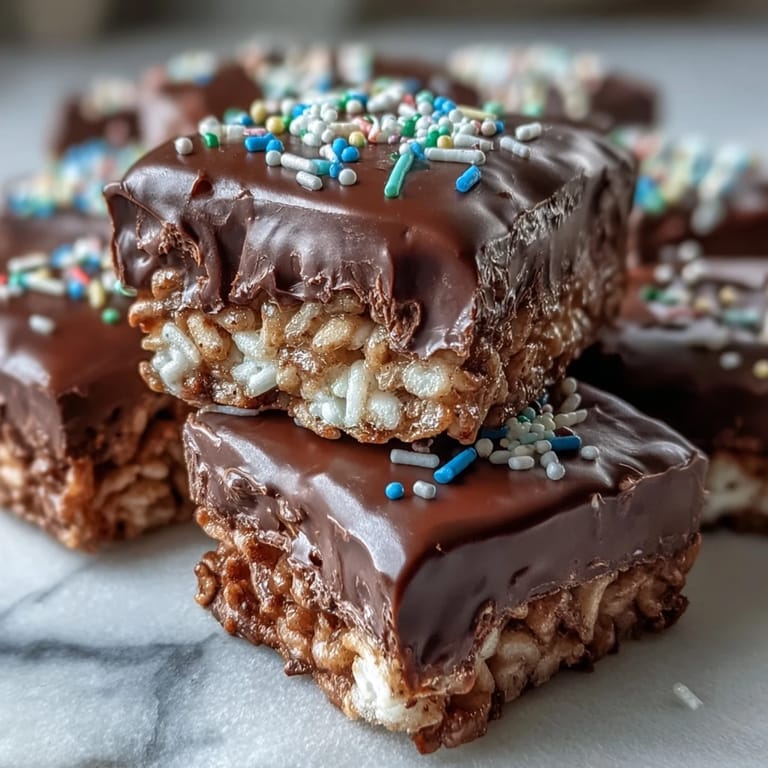
- Once the chocolate is set, lift the block from the pan using the parchment overhang or invert it onto a cutting board. Use a sharp knife to slice into 12 to 16 bars, wiping the blade between cuts for clean edges.
 Pin It
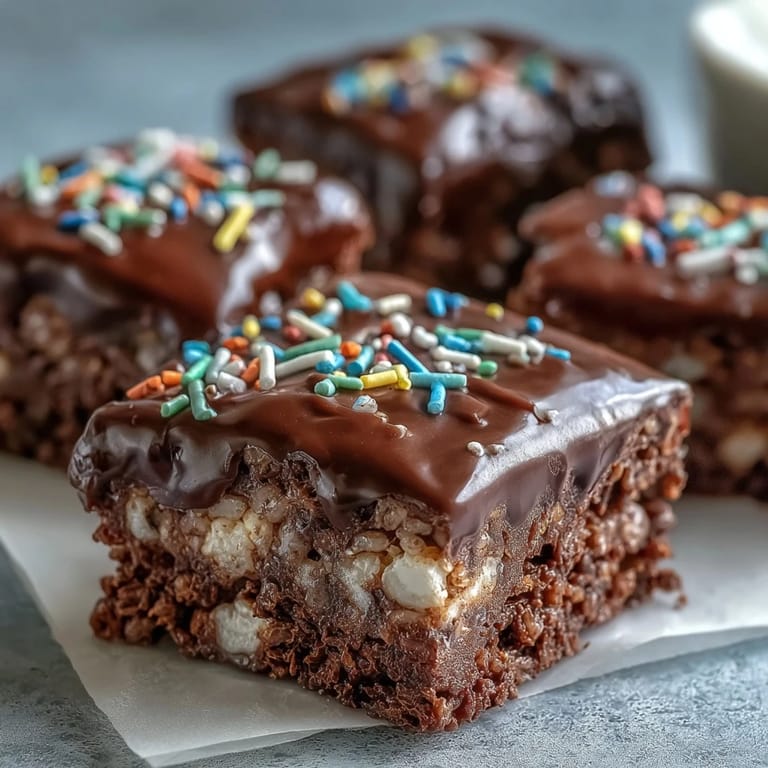
 One rainy Saturday, I made a double batch of these and packed half into a tin for my neighbor, who'd been having a rough week. She texted me an hour later with a photo of her kids covered in sprinkles, all three of them laughing around the kitchen table. That's when I realized these bars aren't just dessert—they're an excuse to brighten someone's day without saying much at all.
Storage and Shelf Life
I keep mine in an airtight container at room temperature, where they stay soft and chewy for up to three days. If your kitchen runs warm, the fridge is a safer bet and will extend their life to about a week. Just let them sit out for a few minutes before serving so the chocolate doesn't feel too firm. I've also frozen them in a single layer, then transferred them to a freezer bag for up to a month, and they thaw beautifully in under an hour.
Flavor Variations
The first time I swapped semisweet chocolate for white chocolate, I added a handful of freeze-dried strawberries on top, and the tangy-sweet combo was a hit at a baby shower. You can also stir half a teaspoon of vanilla extract into the melted marshmallows for a subtle bakery note, or use peanut butter chips in place of chocolate for a nostalgic, lunchbox vibe. If you're feeling bold, drizzle melted caramel over the chocolate layer and sprinkle flaky sea salt for a salted-caramel twist. Each variation changes the personality of the treat without complicating the process.
Serving Suggestions
I love setting out a platter of these at casual gatherings, cutting them into small squares so guests can grab one without committing to a huge portion. They pair beautifully with cold milk, hot coffee, or even a scoop of vanilla ice cream if you want to turn them into a sundae base. For kid's parties, I sometimes stack them on a tiered stand and let everyone pick their own sprinkle pattern.
- Wrap individual bars in wax paper and tie with ribbon for lunchbox treats or party favors.
- Serve alongside fresh berries and whipped cream for a makeshift dessert board.
- Cut into tiny bites and arrange on a dessert table with cookies and brownies for variety.
 Pin It
 Every time I pull a pan of these from the fridge and hear that satisfying snap as I cut through the chocolate, I'm reminded that simple recipes often become the most requested. Make a batch, share them freely, and watch how quickly they disappear.
Recipe Questions
- → How long do chocolate covered treats stay fresh?
Store in an airtight container at room temperature for up to 3 days, or refrigerate for up to a week. The chocolate may develop a slight bloom in the fridge but remains perfectly tasty.
- → Can I freeze these chocolate covered bars?
Yes! Wrap individual bars in plastic wrap and freeze for up to 3 months. Thaw at room temperature for 30 minutes before serving. The texture remains excellent after freezing.
- → What type of chocolate works best for the coating?
Semisweet or dark chocolate chips melt smoothly and provide the best contrast to the sweet marshmallow base. Adding a teaspoon of coconut oil helps achieve a professional, glossy finish that sets firmly.
- → Why did my marshmallows turn hard when melting?
This happens from overheating. Always melt butter and marshmallows over low heat, stirring constantly. Remove from heat as soon as the marshmallows are completely smooth to maintain that perfect gooey texture.
- → Can I make these without chocolate?
Absolutely! The classic Rice Krispy squares are delicious on their own. Press them into the pan, let set for 30 minutes, and cut. You can also top with frosting, peanut butter glaze, or simply enjoy them plain.
- → How do I prevent the chocolate from cracking when cutting?
Let the chocolate set completely at room temperature rather than rushing it in the fridge. Use a sharp knife warmed under hot water and wiped dry between cuts. Score the chocolate lightly first, then press firmly through.