 Pin It
 The first time I attempted making graduation cake pops, the kitchen was scattered with vibrant morsels and stray sugar crystals, echoing the cheers of the day. As I cracked eggs for the cake batter, a faint whiff of vanilla mingled with the anticipation of celebrating my cousin's big moment. My hands were sticky from rolling cake into spheres, but I found myself grinning at each one, imagining how they'd look lined up in school colors. It felt a little like prepping a batch of edible confetti, each pop a bite-sized symbol of joy. There's a certain quiet pride in whipping up treats that mark a milestone, especially when sprinkles and glitter are involved.
Last spring, I pulled a tray of cake pops from the freezer as my little sister buzzed around in her graduation gown, her excitement contagious. We laughed over crooked tassels and candy melts that dripped at odd angles, and somehow, the imperfect pops ended up the stars of her photos. Watching everyone pick out their favorite color and crunch into the sweet coating made the kitchen feel like the heart of the celebration. Something as simple as swirling school colors over cake turned into a memory we still talk about, especially when graduation rolls back around. It's these moments that stick—and so do the cake crumbs!
Ingredients
- Cake: Picking a vanilla or chocolate cake mix makes the base moist and easy, but I learned homemade cake adds another layer of flavor if you're feeling ambitious.
- Frosting: I always opt for cream cheese or buttercream frosting—it binds the crumbs smoothly and gives a subtle creaminess, just don't overdo it or pops will get mushy.
- Candy melts or chocolate coating: Using candy melts in school colors gets those bold hues without worrying about coloring chocolate, while a dash of shortening keeps the coating silky.
- Sprinkles, edible glitter, colored sugar: Decorating became a game when I realized sprinkles hide a multitude of imperfections—sometimes edible glitter is the best fix.
- Lollipop sticks: Invest in sturdy sticks so pops don't topple over; flimsy ones just won't hold the weight.
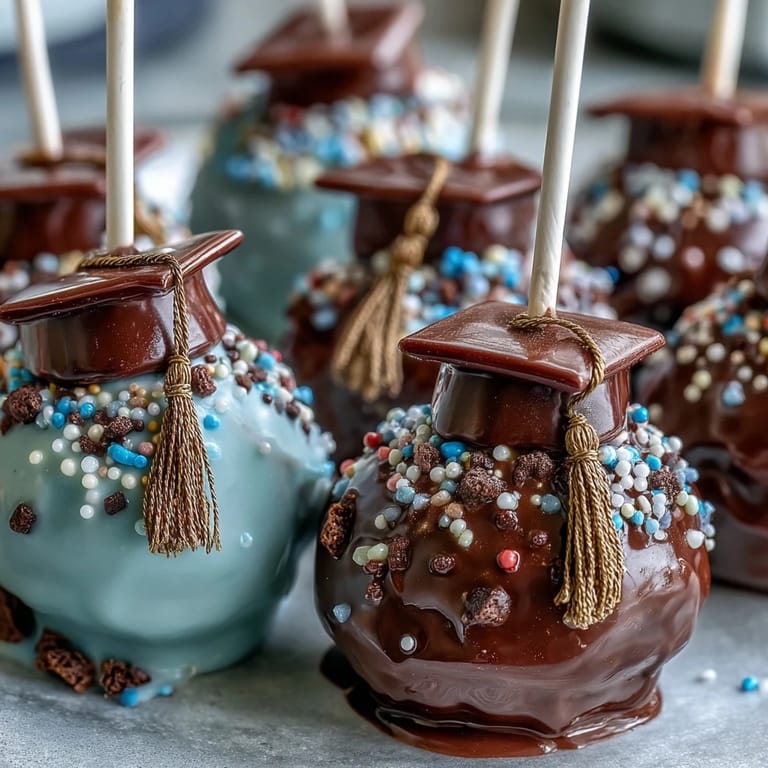
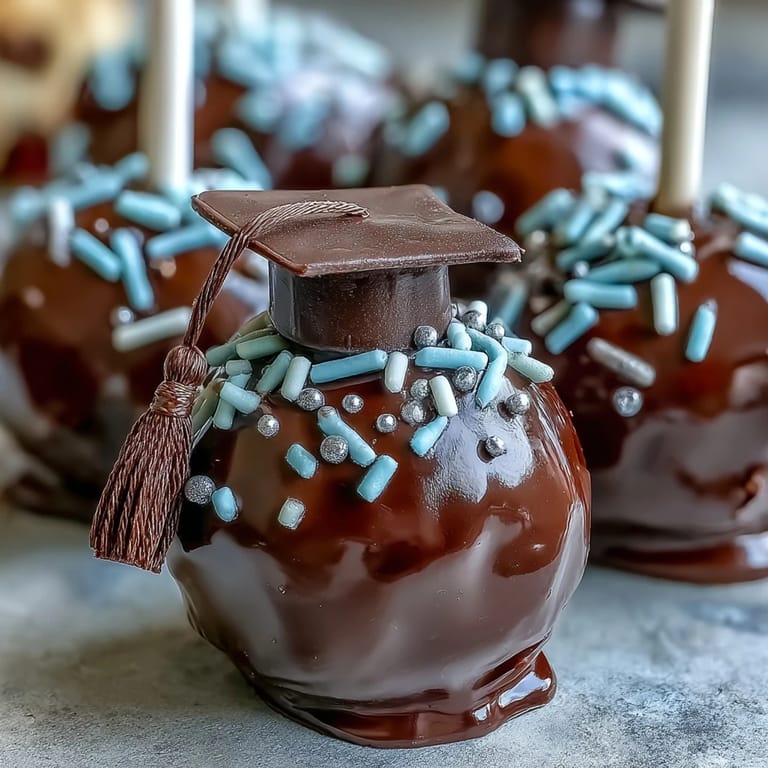
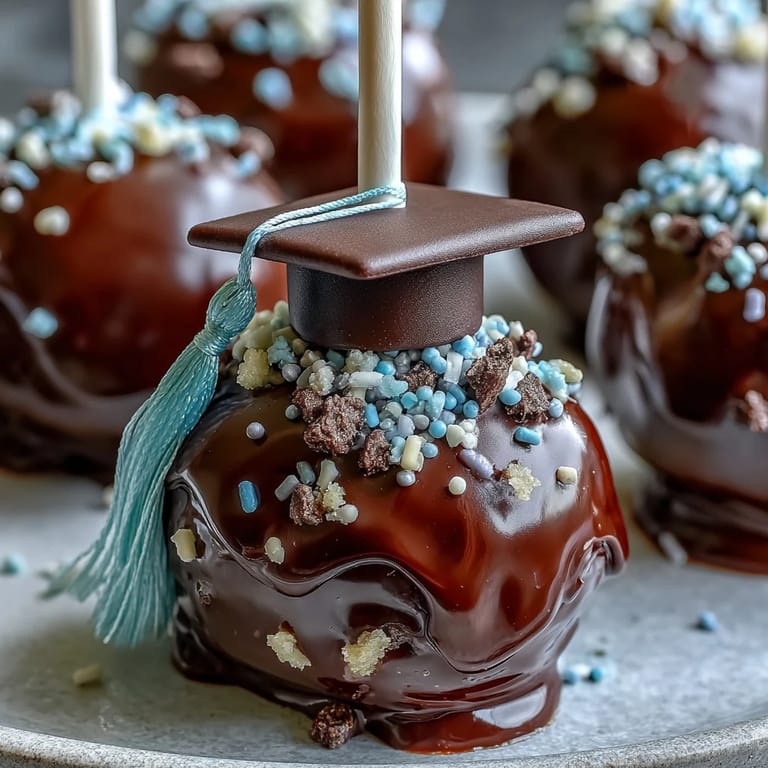
- Mini chocolate chips & fondant: Chocolate chips make cute tassels, and fondant squares transform each pop into a mini graduation cap, perfect for photos.
Tired of Takeout? 🥡
Get 10 meals you can make faster than delivery arrives. Seriously.
One email. No spam. Unsubscribe anytime.
Instructions
- Prep and Bake the Cake:
- Combine your cake mix (or homemade batter) in a bowl, pour into the prepared pan, and bake as directed. The aroma filling the kitchen gives away when it's done—allow the cake to cool completely before moving on.
- Crumble and Mix:
- Break cooled cake into crumbs in a large bowl, marveling at how soft and airy it feels between your fingers. Add frosting gradually, mixing until everything just holds together; the trick is to make it moist without being sticky.
- Form Cake Balls:
- Shape tablespoon-sized portions into balls, rolling gently until they're smooth. Line up the balls on a baking sheet so they'll chill evenly.
- Chill the Cake Balls:
- Cover and refrigerate for an hour, or freeze for 20 minutes. They need to be firm to survive dipping without breaking apart.
- Melt the Candy Coating:
- Microwave candy melts in short bursts, stirring until glossy; if too thick, add shortening and stir again. The colors should be vibrant and fluid—no clumps or dull spots.
- Attach Sticks:
- Dip the tip of each stick into coating, then into a cake ball—this little trick anchors the pop to the stick and stops it from sliding off.
- Dip and Decorate:
- Submerge each pop into your colorful melted coating, tapping gently to shake off excess. While still wet, pile on sprinkles, glitter, or colored sugar for maximum impact.
- Graduation Cap Assembly:
- To make caps, press a fondant square on top of each pop and fix a chocolate chip with melted coating for the tassel. It often takes a steady hand but anything goes—mistakes are just character.
- Set and Serve:
- Insert pops into a styrofoam block or cake pop stand so the coating hardens untouched. Once set, admire your handiwork and get ready for applause!
 Pin It
 When my neighbor's daughter graduated, she sent a thank-you card just for the cake pops, not the regular cake. That little gesture made me realize these treats really do turn moments into celebrations. Sometimes small bites leave big impressions.
Making Graduation Memories
Having a cake pop assembly line with friends transforms a simple recipe into shared laughter and teamwork. Whether it's someone misplacing the sprinkles or carefully crafting fondant caps, every hand adds its own flair. It's easy to forget you're working together until someone starts comparing their creations like trophies. I always encourage letting guests decorate their own pops so everyone leaves with a sweet memory. You'll notice the kitchen feels like a small party before the big event even starts.
Getting Your Colors Just Right
Color matching candy melts to school hues became my graduation party challenge—sometimes I melt white chocolate and swirl in gel food coloring for custom shades. If candy melts seem too dull, edible glitter or bold sprinkles instantly brighten the effect. I learned to test one pop before committing the whole batch—it's easier to fix mistakes early when you're working with vibrant colors. The secret is blending and layering decorations until they look lively and unmistakably festive. Don't stress if colors aren't exact—it's the enthusiasm behind the pop that shines through.
Easy Serving and Storage for Busy Days
Graduation weekends can be a whirlwind, so I make cake pops ahead and store them in an airtight container—they last beautifully at room temp or chilled. If you need to transport them, a styrofoam block keeps pops upright and prevents damage to delicate décor. Cake pop stands aren't just for presentation—they're fantastic for keeping pops safe before the party. Plan your timing so the coating hardens well, and don't panic if you run a little late—these pops forgive a rushed schedule.
- Bring extras—they're always the first to disappear.
- Let kids help with decorations; their creativity is infectious.
- Check for dietary needs and label flavors or ingredients to be safe.
 Pin It
 With the right colors and a little teamwork, graduation cake pops transform even the busiest gatherings into something joyful and memorable. Here's wishing you lots of celebration, laughter, and a kitchen sprinkled with edible glitter!
Recipe Questions
- → How do I customize cake pops to match school colors?
Select candy melts or colored chocolate and decorations that reflect your chosen school shades. Fondant can be tinted for cap details.
- → Can cake pops be made gluten-free?
Use gluten-free cake mix and check ingredients for decorations to ensure compatibility with dietary restrictions.
- → Which frosting works best for binding cake crumbs?
Cream cheese or buttercream frosting both add moisture and flavor. Mix gradually until the dough holds together.
- → How should cake pops be stored after decorating?
Keep treats in an airtight container at room temperature for up to three days, or refrigerate for longer freshness.
- → Can cake pops be prepared ahead of time?
Yes, prepare and decorate in advance. Refrigerate pops for optimal freshness, allowing coatings to set and decorations to stay intact.
- → How do I achieve a smooth chocolate coating?
Melt candy melts in batches, adding vegetable shortening if needed for a thinner texture. Dip and tap off excess gently for a glossy finish.