 Pin It
 My kids used to beg for fast food chicken strips until I started making these on Sunday nights. The sound of panko hitting the hot oven, that toasted-grain smell filling the kitchen, it changed everything. Now they hover by the oven door, arguing over who gets the crispiest piece. I love that I can pronounce every ingredient and still get that satisfying crunch. Its become our reset meal after chaotic weeks.
I made these for a potluck once, stacked in a basket lined with parchment, and they vanished before the salads even came out. A neighbor asked if I'd catered them. I just smiled and said it was panko, good olive oil, and a hot oven. Sometimes the simplest tricks feel like magic when they work. That night, I realized I'd never buy frozen tenders again.
Ingredients
- Boneless, skinless chicken breasts or tenders (500 g): Pat them really dry with paper towels or the breading won't stick, I learned that the messy way.
- Salt (1/2 tsp) and black pepper (1/4 tsp): Season the chicken directly so every bite has flavor, not just the crust.
- All-purpose flour (100 g): This first coating helps the egg mixture cling, think of it as glue for your breading.
- Large eggs (2) and mayonnaise (2 tbsp): The mayo adds richness and helps the panko stick better than egg alone, Greek yogurt works too if you want tang.
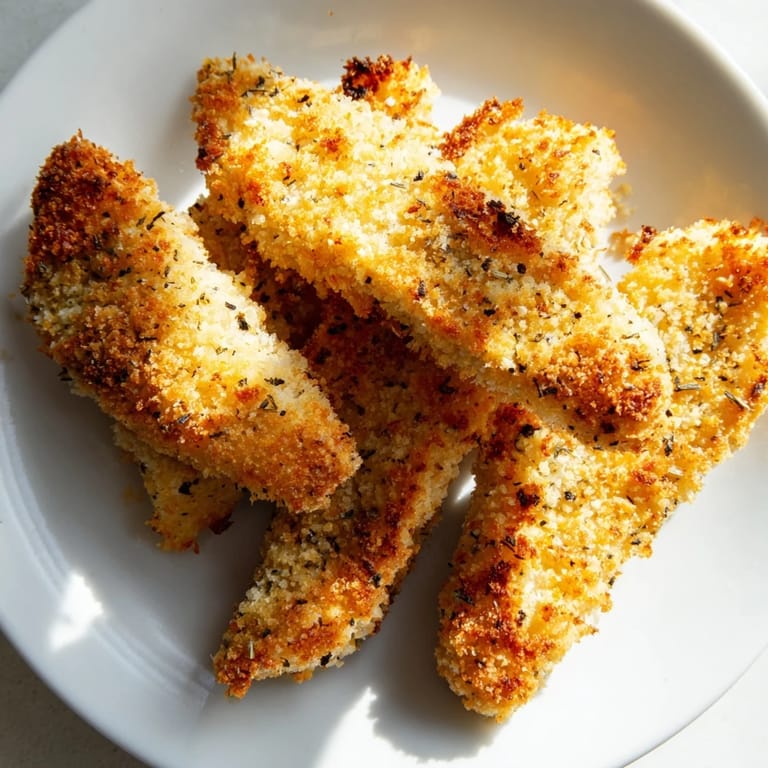
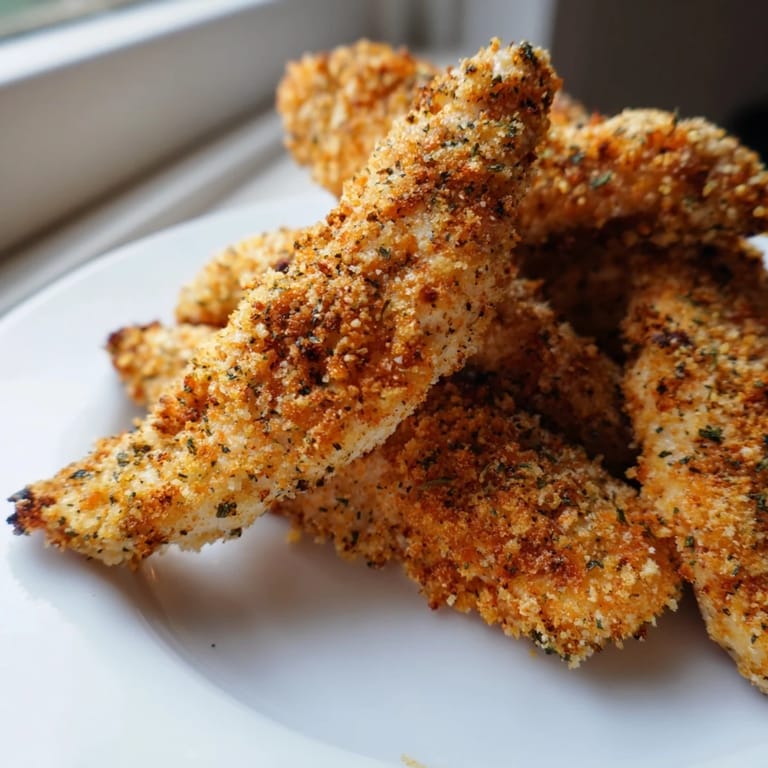
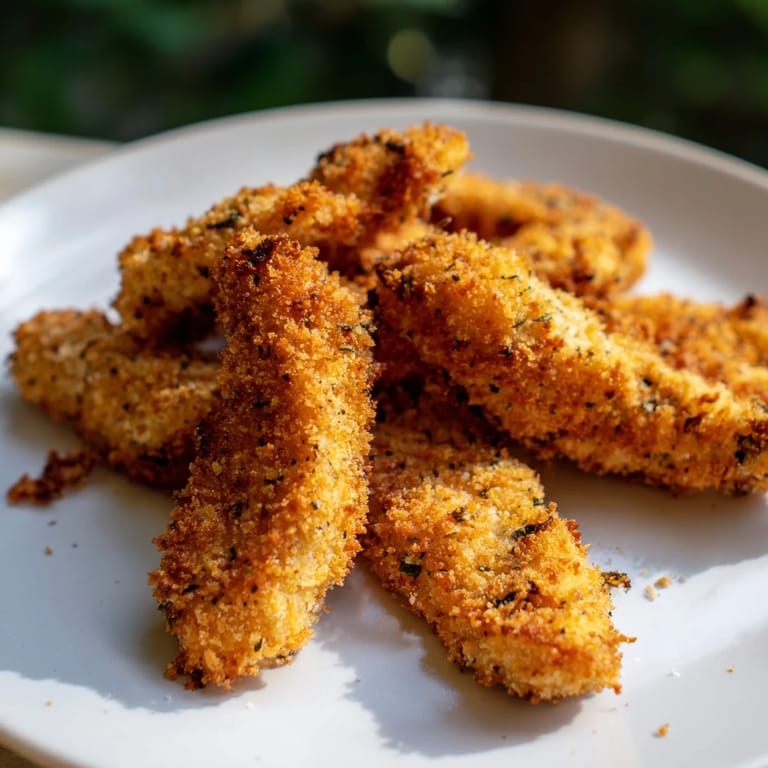
- Panko breadcrumbs (120 g): The secret to that airy, crunchy texture, regular breadcrumbs just don't compare.
- Dried Italian herbs (1 1/2 tsp), garlic powder (1/2 tsp), smoked paprika (1/2 tsp), cayenne pepper (1/4 tsp, optional): This blend makes the crust taste like something from a chef's kitchen, adjust the cayenne to your heat tolerance.
- Olive oil (2 tbsp): A light drizzle before baking turns the panko golden and crispy, don't skip this step.
Tired of Takeout? 🥡
Get 10 meals you can make faster than delivery arrives. Seriously.
One email. No spam. Unsubscribe anytime.
Instructions
- Preheat and Prep Your Pan:
- Set your oven to 220°C (425°F) and line a baking sheet with parchment or set a wire rack on top. The rack lets hot air circulate underneath for even crispiness.
- Cut and Season the Chicken:
- Pat the chicken completely dry, then slice into strips about 2 cm wide so they cook evenly. Sprinkle with salt and pepper on both sides.
- Set Up Your Breading Station:
- Grab three shallow bowls: flour in the first, whisked eggs and mayo in the second, panko mixed with all the herbs and spices in the third. Line them up like an assembly line.
- Coat Each Strip:
- Dredge a chicken strip in flour, shake off the excess, dip it in the egg mixture until fully coated, then press it into the panko, turning to coat all sides. Repeat with the rest.
- Arrange and Oil:
- Place the coated strips on your prepared pan, leaving a little space between each one. Drizzle or spray them lightly with olive oil so they crisp up beautifully.
- Bake Until Golden:
- Slide the pan into the oven and bake for 18 to 22 minutes, flipping halfway through. They're done when golden brown and the internal temperature hits 74°C (165°F).
- Rest Before Serving:
- Let them sit for 2 to 3 minutes after pulling them out, this lets the coating set and stay extra crispy. Serve warm with your favorite dipping sauce.
 Pin It
 One evening my daughter asked if we could eat these while watching a movie, no plates, just a big platter and napkins. We sat on the floor, dipping strips in honey mustard and sriracha mayo, laughing at the crumbs on our shirts. That's when I realized this recipe wasn't just about dinner. It was about slowing down and being together without any fuss.
Serving Suggestions
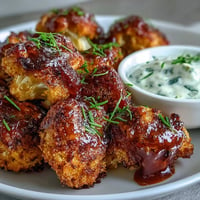
These strips shine with classic honey mustard, creamy ranch, or spicy sriracha mayo on the side. I also love pairing them with a simple coleslaw or roasted sweet potato wedges for a full meal. If you're feeling fancy, serve them over a green salad with a tangy vinaigrette. They're versatile enough for a casual dinner or a game day spread. A crisp Sauvignon Blanc or cold lager cuts through the richness perfectly.
Storage and Reheating
Store leftover strips in an airtight container in the fridge for up to three days. To bring back the crunch, reheat them in a 200°C (400°F) oven for about 8 minutes instead of the microwave. You can also freeze them after baking, just let them cool completely first, then wrap tightly. When you're ready, reheat from frozen in the oven until warmed through and crispy again. They won't be quite as perfect as fresh, but they're still a lifesaver on busy nights.
Customization Ideas
If you want a cheesy twist, toss some grated Parmesan into the panko mixture before coating. For a gluten-free version, swap in gluten-free panko and flour without changing anything else. You can also play with the spice blend, try adding onion powder, cumin, or even a pinch of dried rosemary. My friend once added lemon zest to the panko and it was incredible. The recipe is forgiving, so experiment and make it yours.
- Add grated Parmesan to the panko for a savory, nutty crust.
- Use gluten-free panko and flour for a celiac-friendly version.
- Toss in lemon zest or fresh herbs for a bright, herby finish.
 Pin It
 These crispy panko chicken strips have earned a permanent spot in my weekly rotation, and I hope they do the same for you. They're proof that homemade can be easy, delicious, and way better than anything from a drive-thru.
Recipe Questions
- → How do I get the chicken strips extra crispy?
Use a wire rack on your baking sheet to allow air circulation underneath. Flip the strips halfway through baking and lightly spray or drizzle with olive oil before baking. Panko breadcrumbs naturally crisp better than regular breadcrumbs due to their larger, coarser texture.
- → Can I prepare these ahead of time?
Yes, you can bread the chicken strips up to 4 hours in advance and refrigerate them on a baking sheet. You can also freeze breaded strips for up to 2 months. Bake directly from frozen, adding 5-7 minutes to the cooking time.
- → What's the best way to check if chicken is fully cooked?
Use an instant-read thermometer inserted into the thickest part of the largest strip. The internal temperature should reach 74°C (165°F). If you don't have a thermometer, cut into the thickest strip—no pink should remain inside.
- → Can I use chicken thighs instead of breasts?
Yes, chicken thighs work well and tend to stay juicier during cooking. They may require slightly longer baking time (22-25 minutes) due to their thicker cut. Ensure they still reach 74°C (165°F) internal temperature.
- → How do I make this gluten-free?
Replace all-purpose flour with a gluten-free flour blend and use gluten-free panko breadcrumbs. Both are widely available at most grocery stores. The rest of the ingredients are naturally gluten-free. Always verify labels for cross-contamination warnings.
- → What are good dipping sauce options?
Try honey mustard, ranch dressing, spicy sriracha mayo, barbecue sauce, or a simple lemon aioli. Greek yogurt mixed with garlic and herbs creates a lighter, protein-rich dip. For Asian-inspired pairings, consider sweet chili sauce or peanut sauce.